How to add or remove add-ons?
Navigating add-ons for your company can sometimes be confusing, leading to mix-ups like purchasing company add-ons when you meant to buy member add-ons, and vice versa. It's important to tailor your subscription to fit your needs accurately.
You have the flexibility to manage your add-ons directly from your billing settings in your account. Whether you need to add new or remove unnecessary ones, you can make changes at any time. The system automatically calculates any charges based on your billing period and applies prorated charges accordingly.
This guide will walk you through the process of managing add-ons from your account, ensuring you can maximize the functionality of your company without any hassle.
Steps to manage Add-ons:
- 1
-
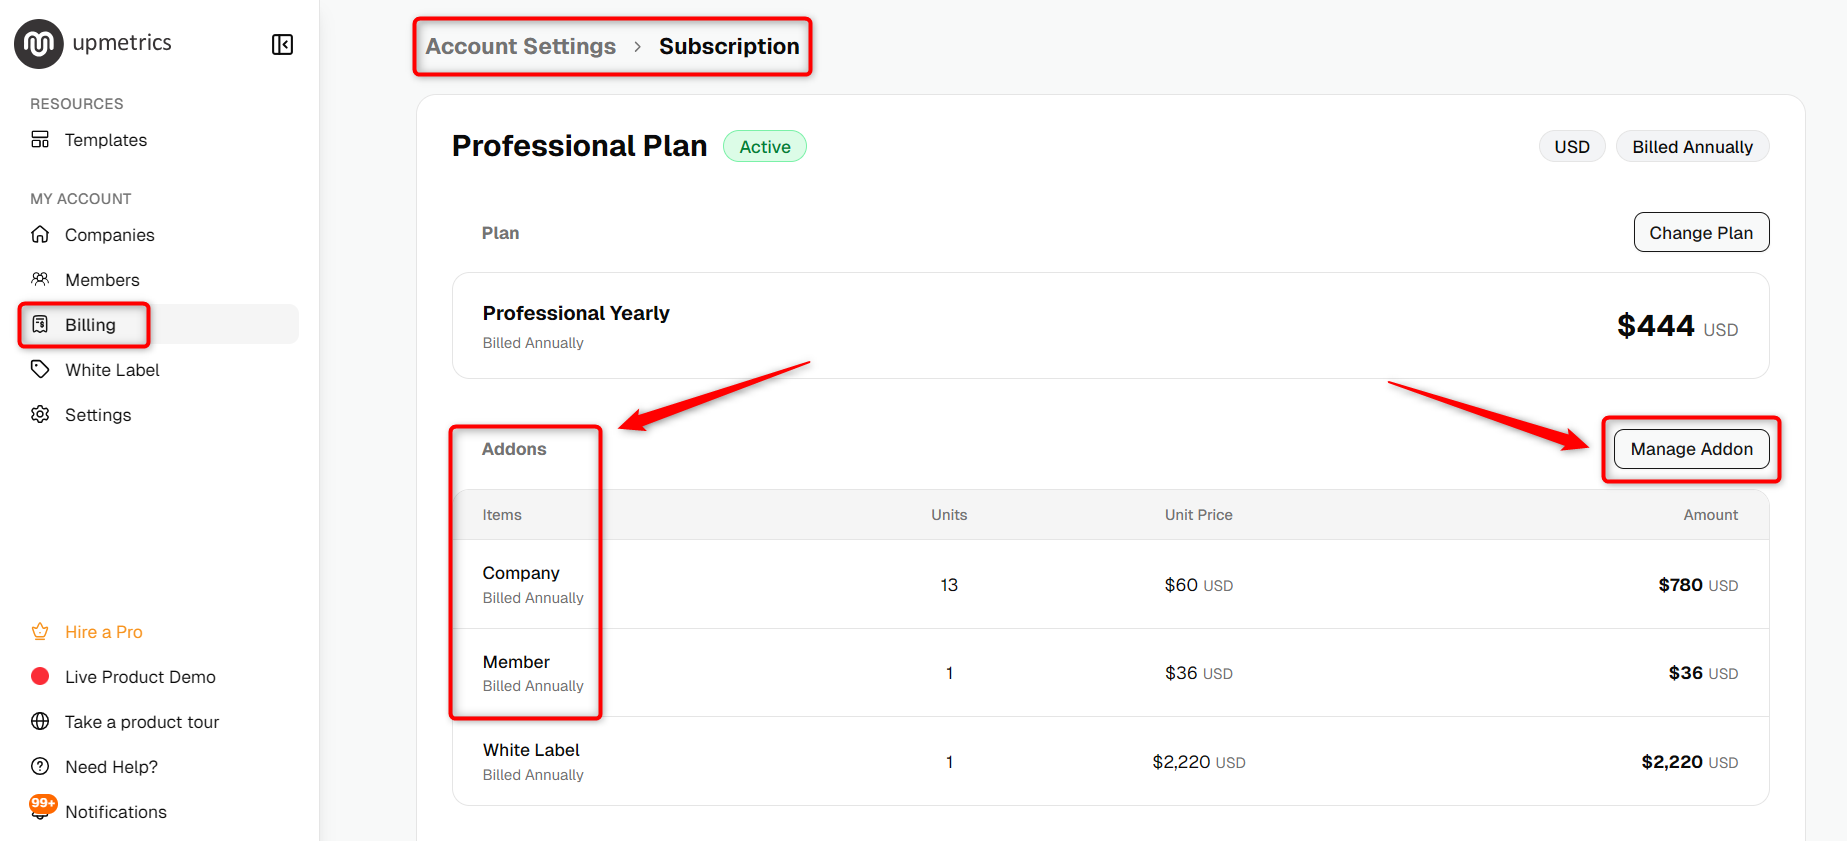
Log in to your account and go to the Billing section from the left-hand sidebar.

- 2
-
Here in the Billing section, locate the Addons tab.
Click on Manage Company or Manage Member, depending on which type of add-on you wish to adjust.
- 3
-
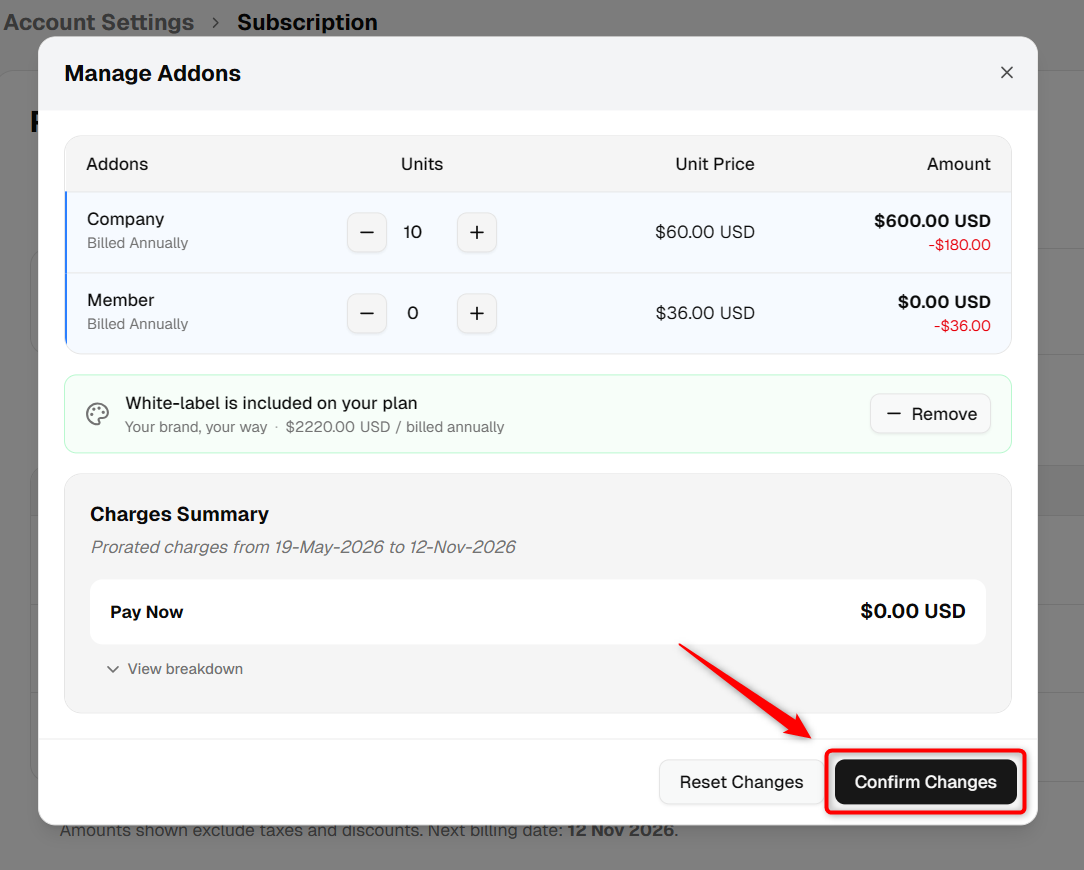
A pop-up will appear allowing you to modify the number of add-ons.
Use the ( +) or (-) buttons to add or remove company or member add-ons as needed.

- 4
-
Review the prorated charges that will apply based on the changes you've made.
Confirm the changes by clicking on Confirm Changes, and proceed to complete any necessary payment.
- 5
-
After completing the payment process, you can return to the Billing section to verify the updated status of your add-ons.
Any credits generated from prorated charges will be automatically applied to future renewals.


TIP: Need to archive a company? Refer to this help guide.

NOTE: If you remove any add-ons (e.g., Companies or Member Add-ons) during your billing period, you’ll receive a prorated credit for the unused time. This credit will be applied to your future renewals..
With the flexibility to manage add-ons directly through your account, we allow you to keep your account scalable to your business's evolving needs.