Setting up a new company
Each Company is dedicated to one business plan, keeping your work focused on a single project.
You can also create multiple Companies for different projects and switch between them as needed.
Setting up a new Company in Upmetrics has two phases. First, you create the Company itself by configuring your company details. Then, you'll complete your Business Profile, where you provide business information that Upmetrics uses to personalize your planning and generate a tailored business plan.
In this Article:
How to add and set up a new Company?
- 1
-
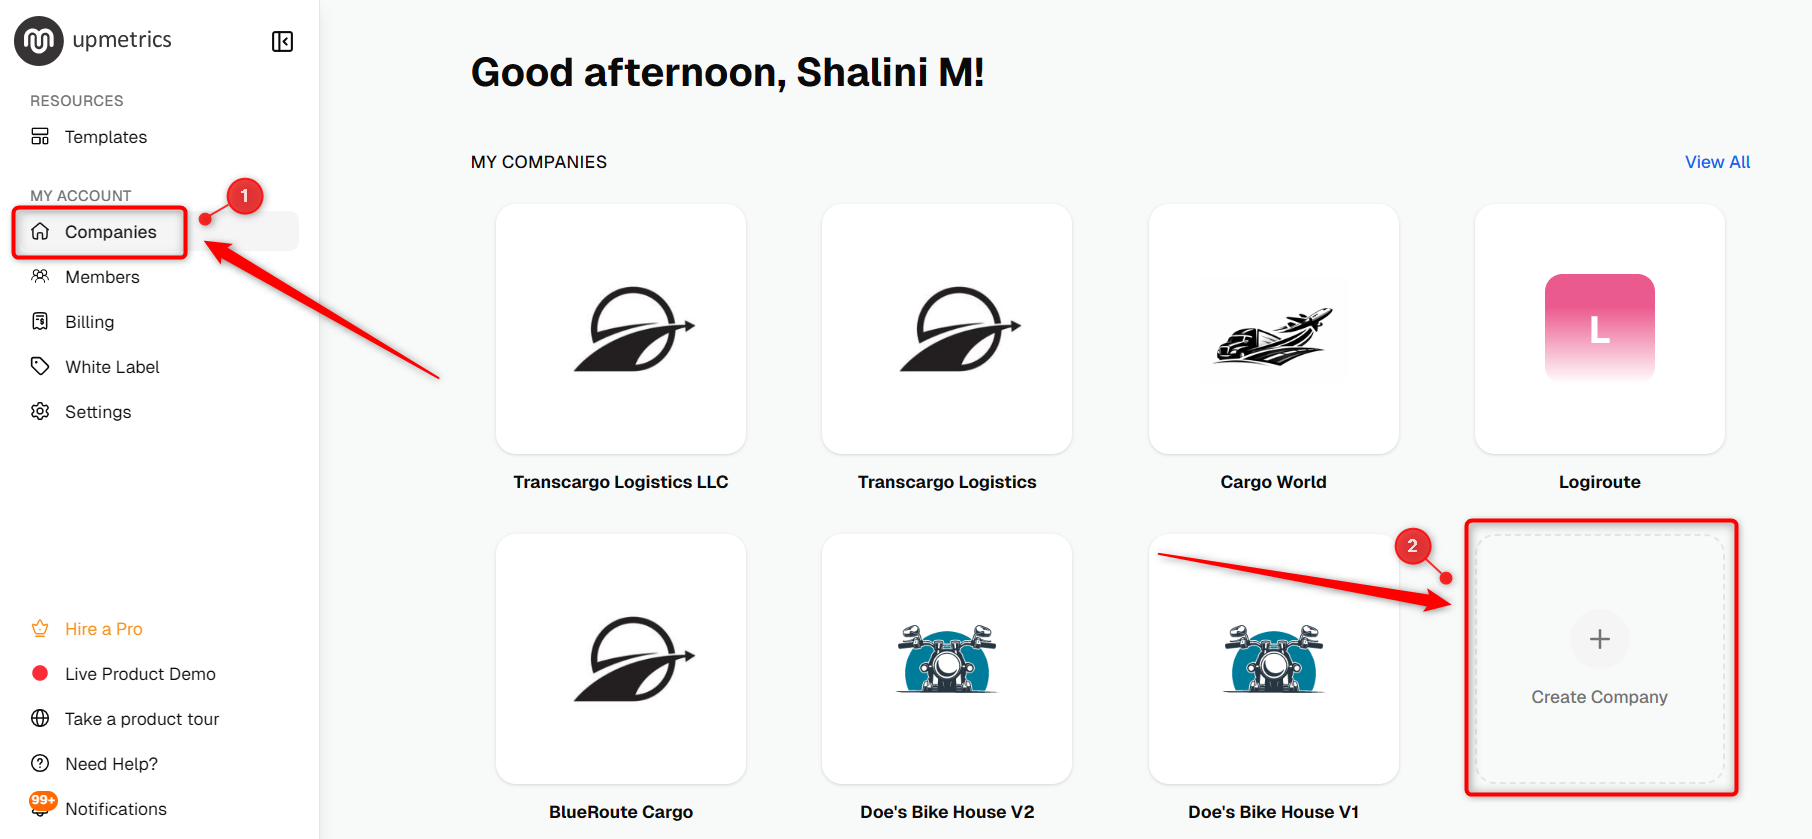
After logging in to your account, go to the Companies option in the left sidebar and click Create Company.
- 2
-
Enter your Company Name to continue to the Company Setup page.

- 3
-
On the Company Profile page, complete the following details:
- Company Logo: Upload your business logo.
- Business Name: Enter the name of your business.
- Language: Select the language you want to use for this Company.
Click Next to continue.

- 4
-
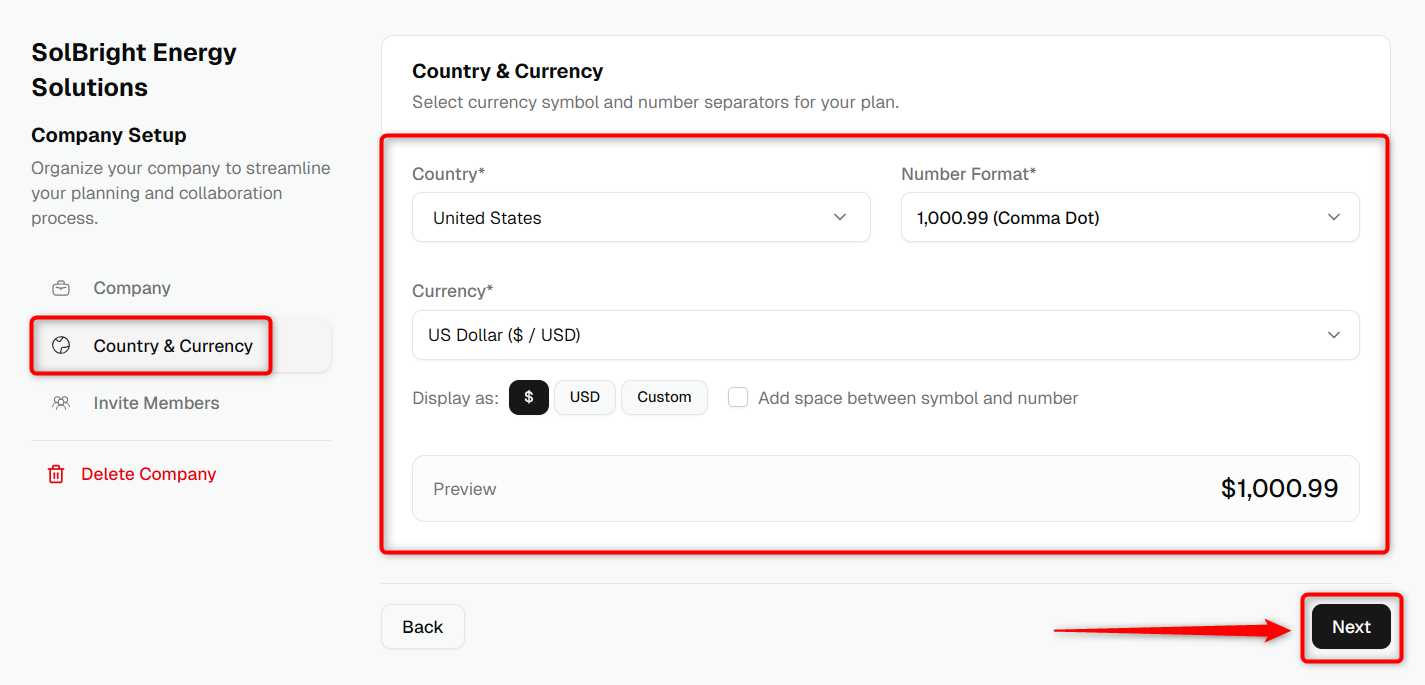
In the Country & Currency section, select your business Country and Currency.
You can also customize:
- Number Format
- Display Options
- Space between currency symbol and amount
Click Next to continue.
- 5
-
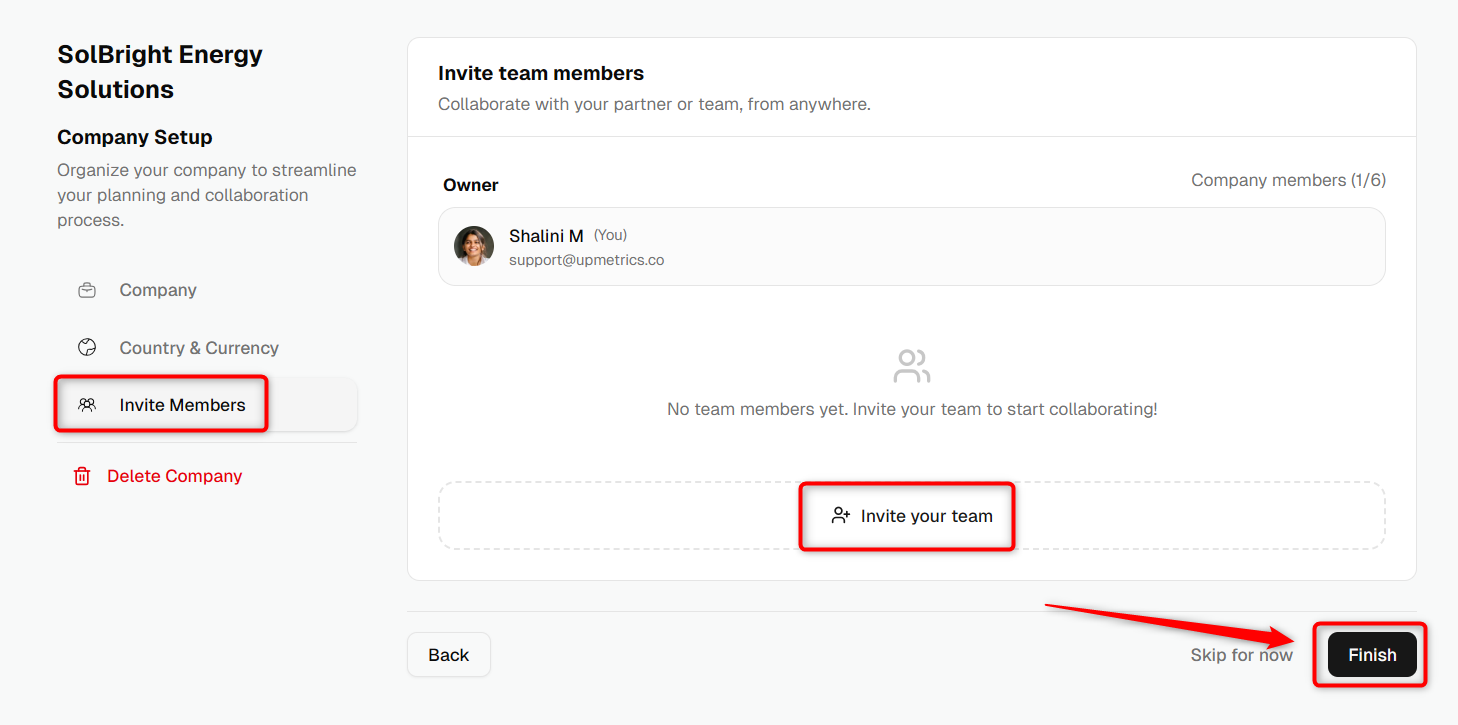
In the Invite Team Members section, invite teammates, colleagues, or business partners to collaborate on the Company.
Click Finish to complete the Company setup.


How to complete your Business Profile?
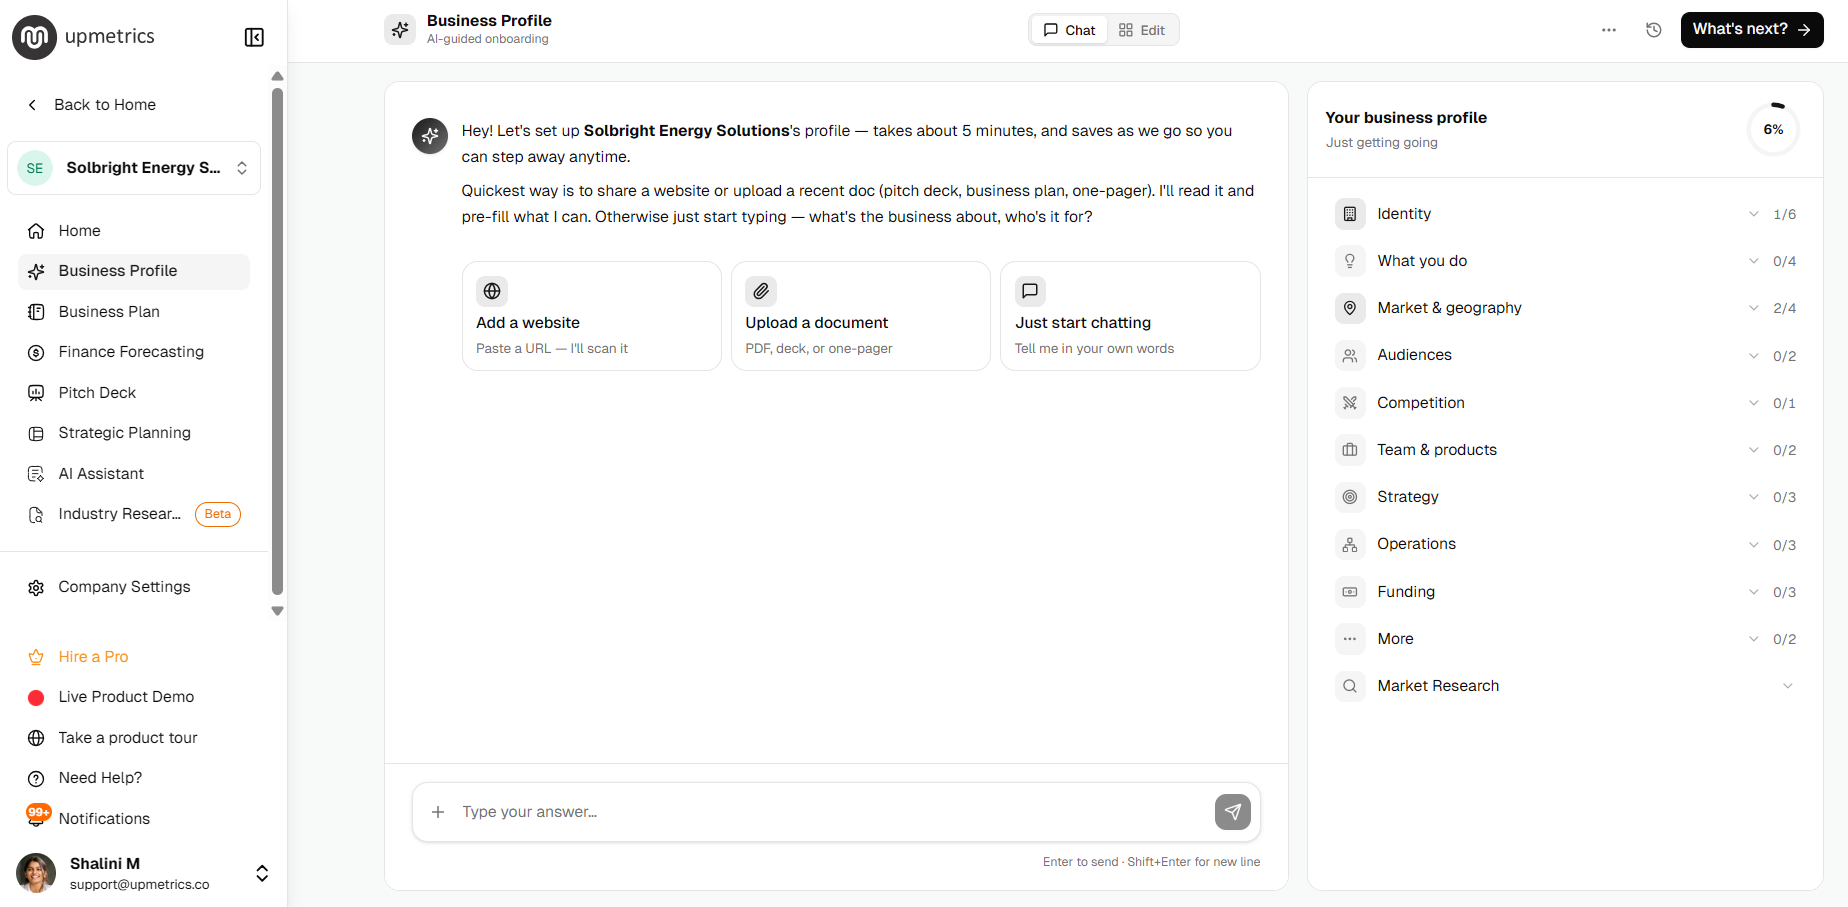
After completing the Company setup, you'll be taken to the Business Profile. This profile stores key information about your business and is used throughout Upmetrics to generate personalized business plans, financial forecasts, and other AI-powered content.
- 1
-
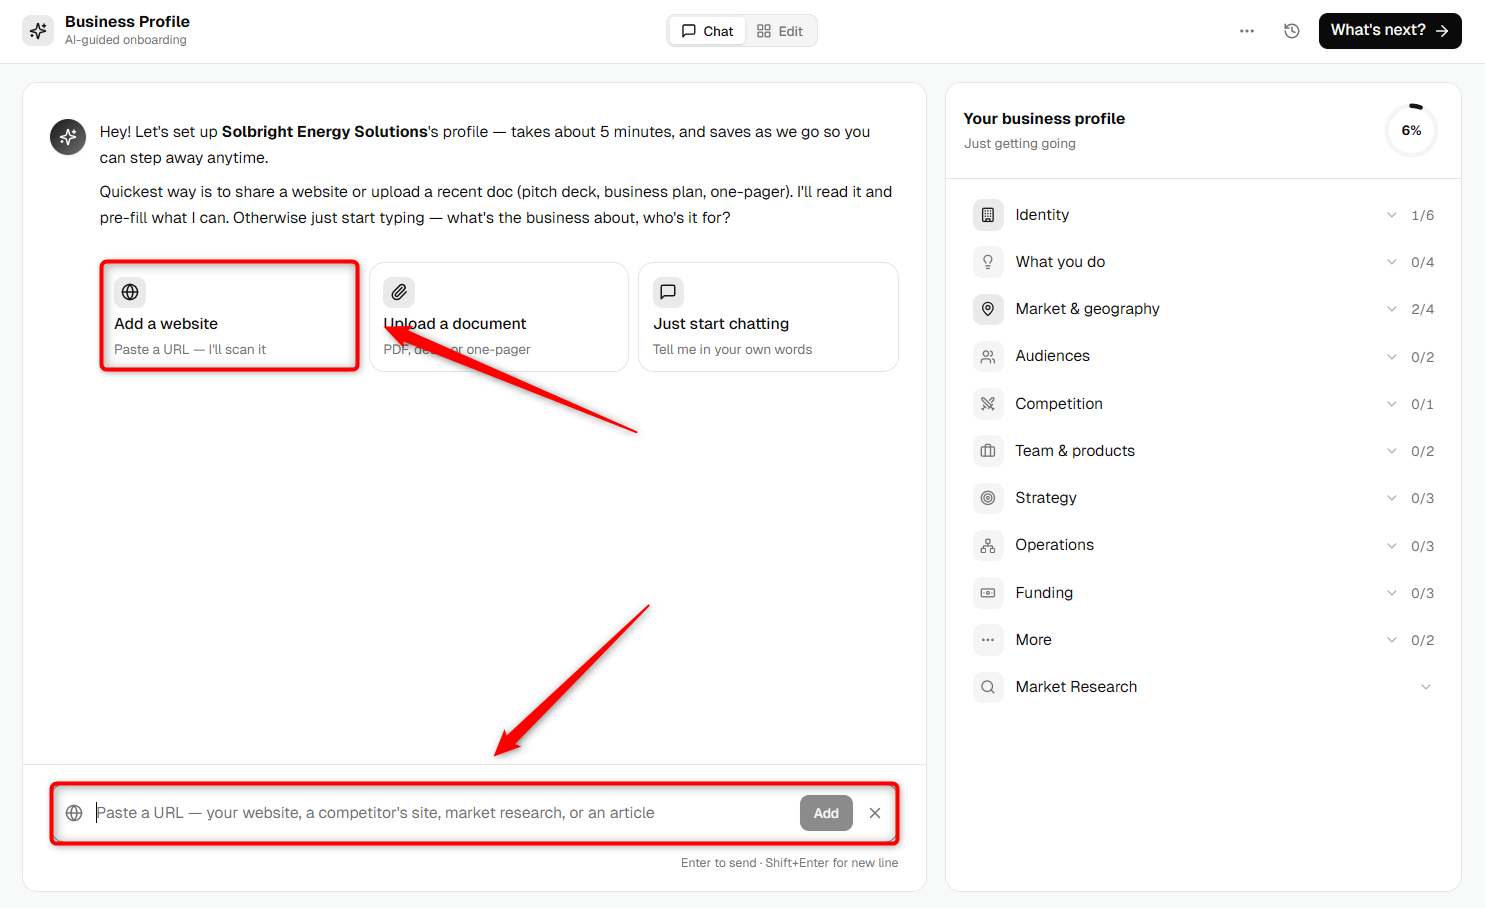
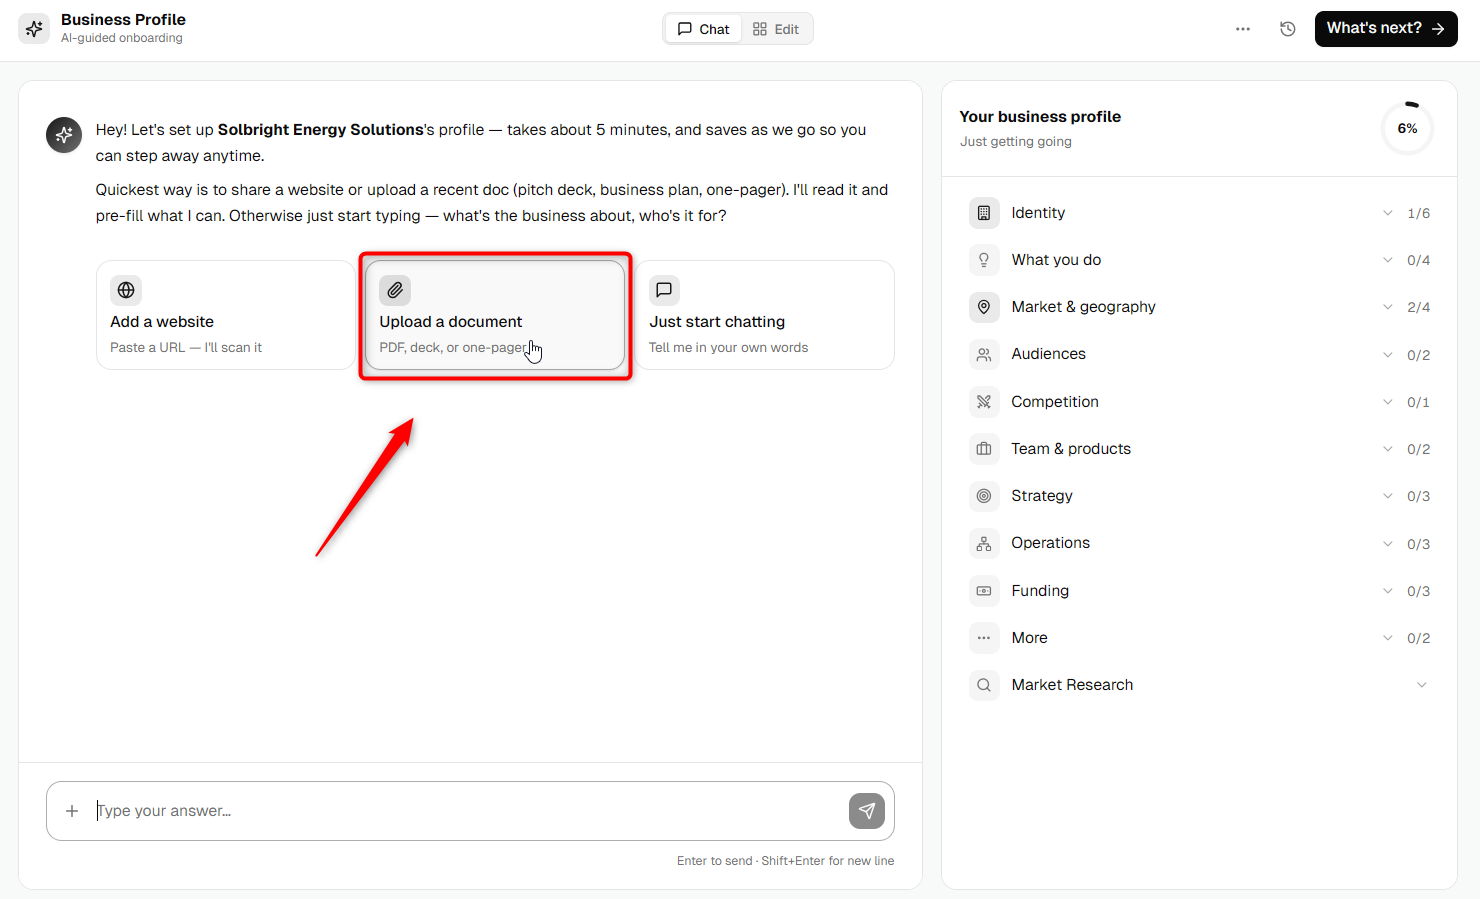
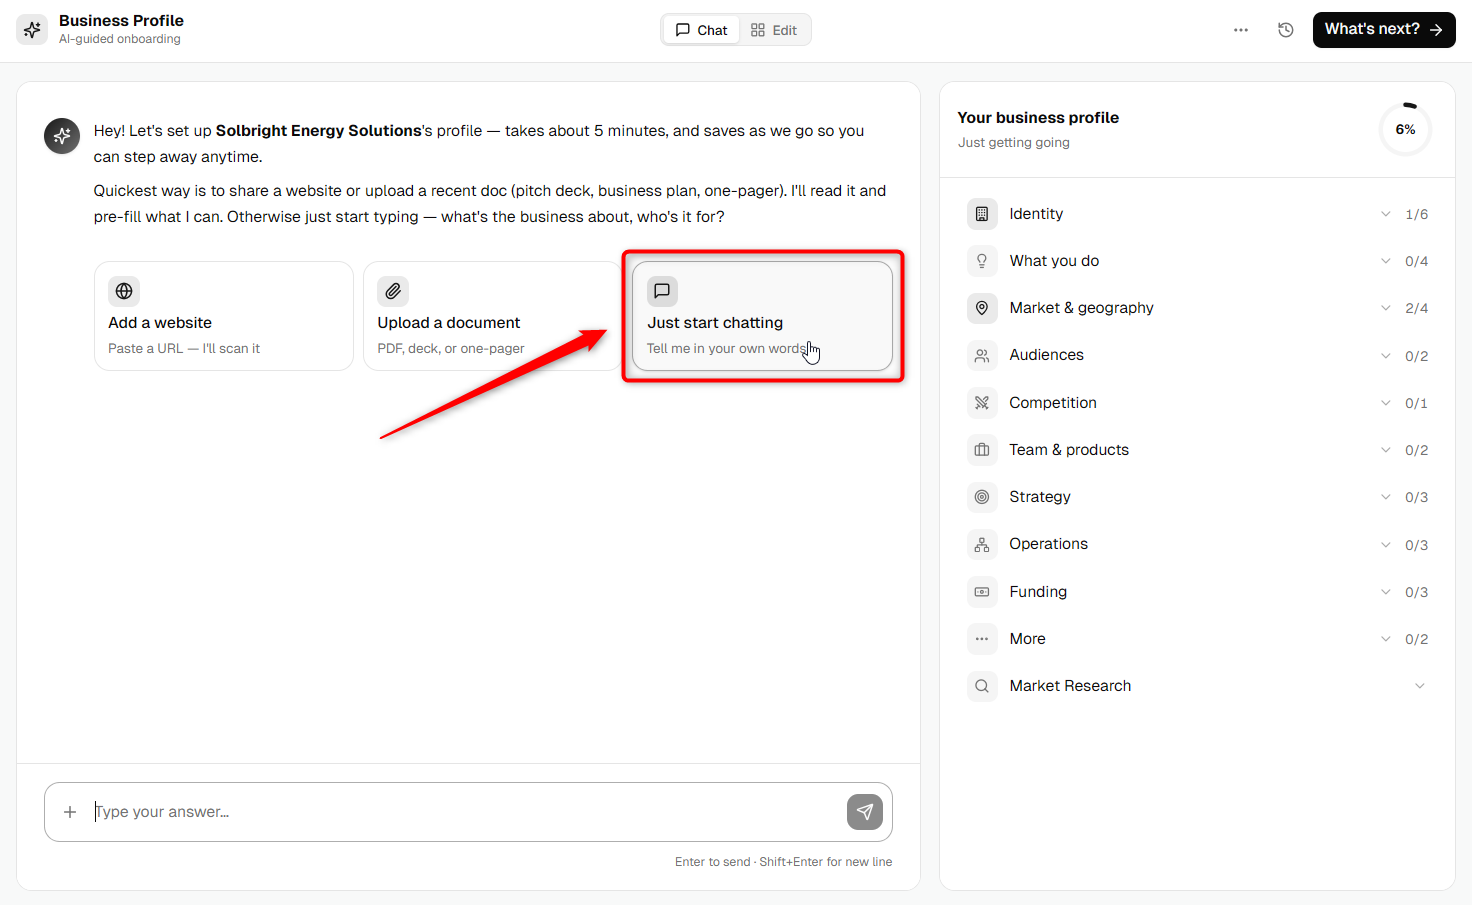
Choose one of the available options to provide your business information:
- Add a Website to automatically extract business details.
- Upload a Document such as a business plan, pitch deck, or one-pager for AI to analyze.
- Just Start Chatting and describe your business in your own words.
- 2
-
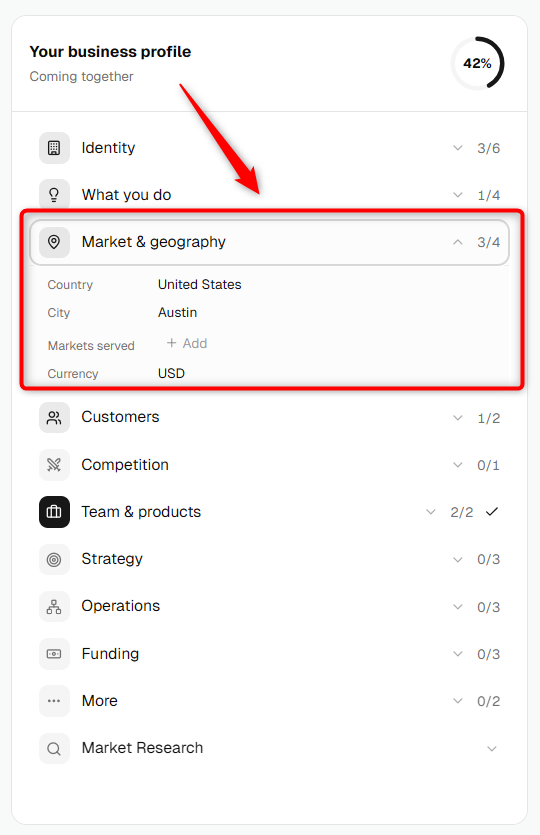
As you provide information, the Your Business Profile panel on the right displays your overall completion progress and shows which sections have been completed.
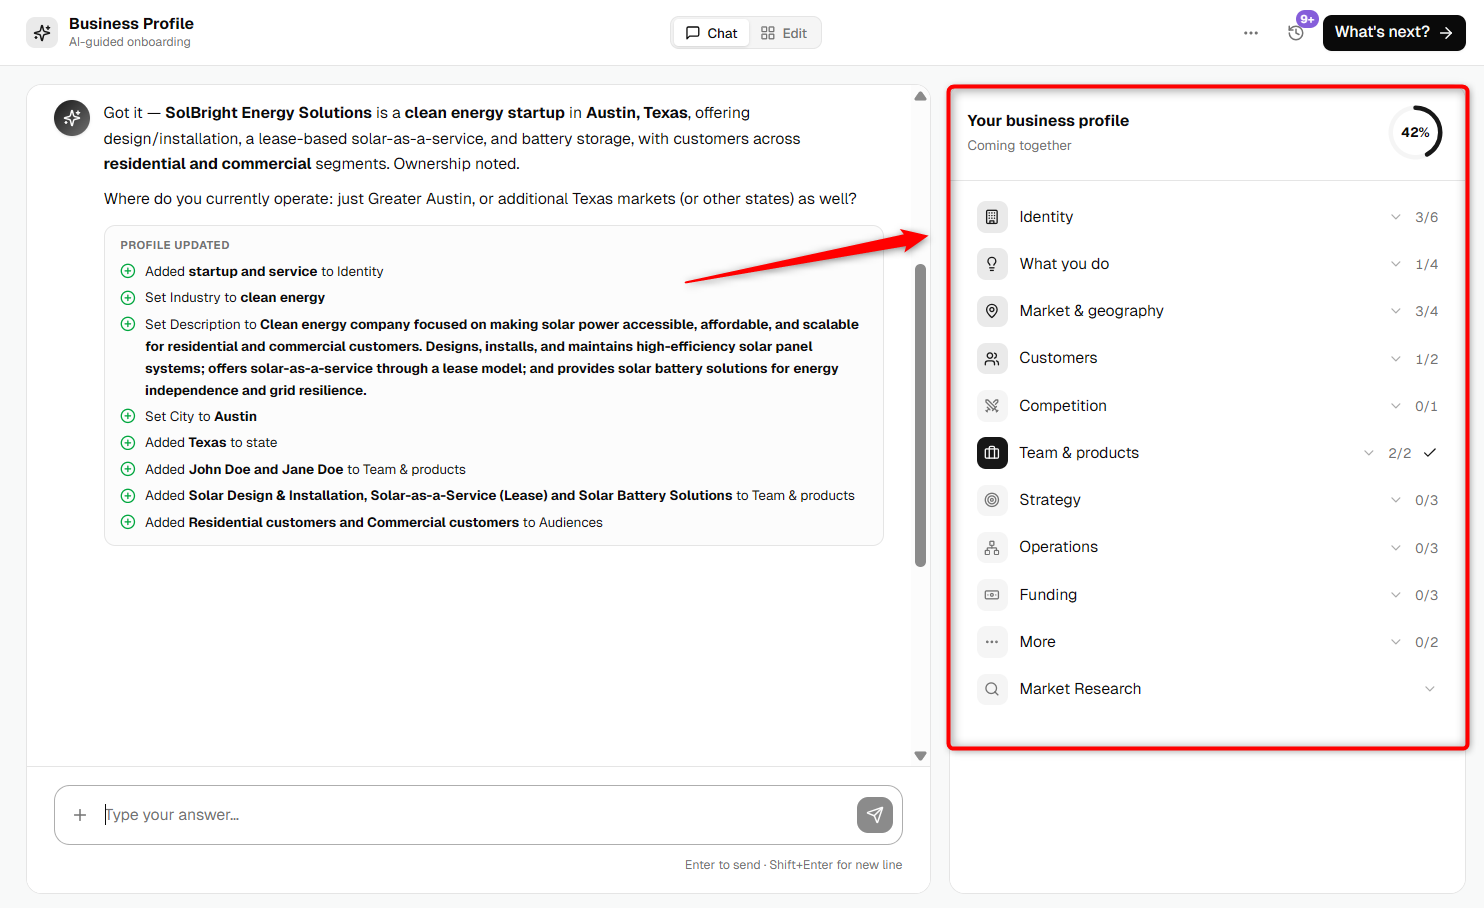
You can expand each category to review the information that has already been collected.
- 3
-
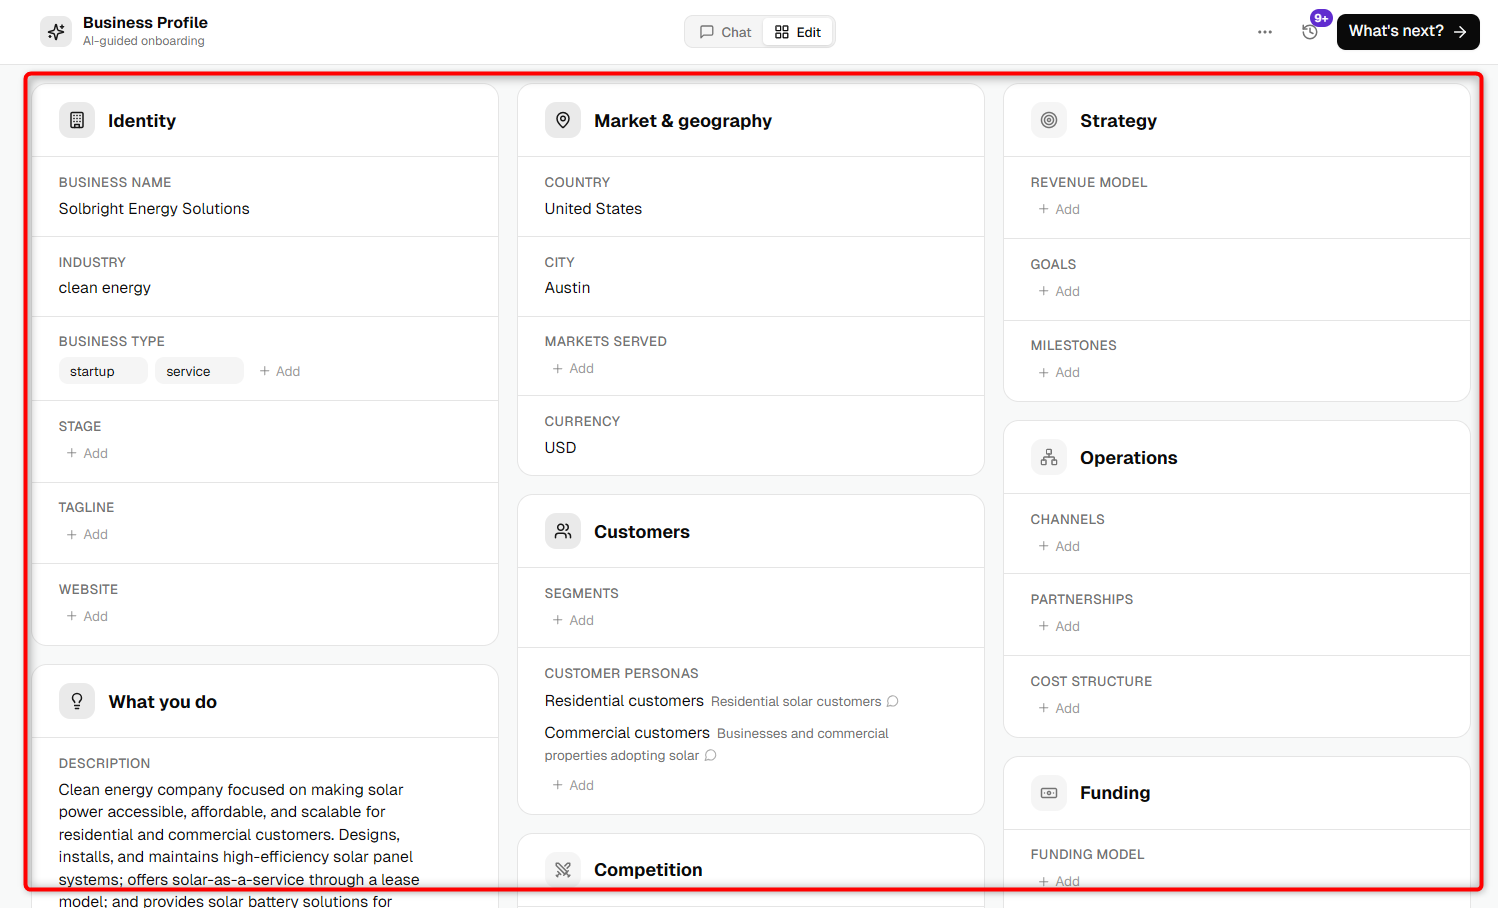
If you want to review or update any information manually, click the Edit tab at the top of the page.
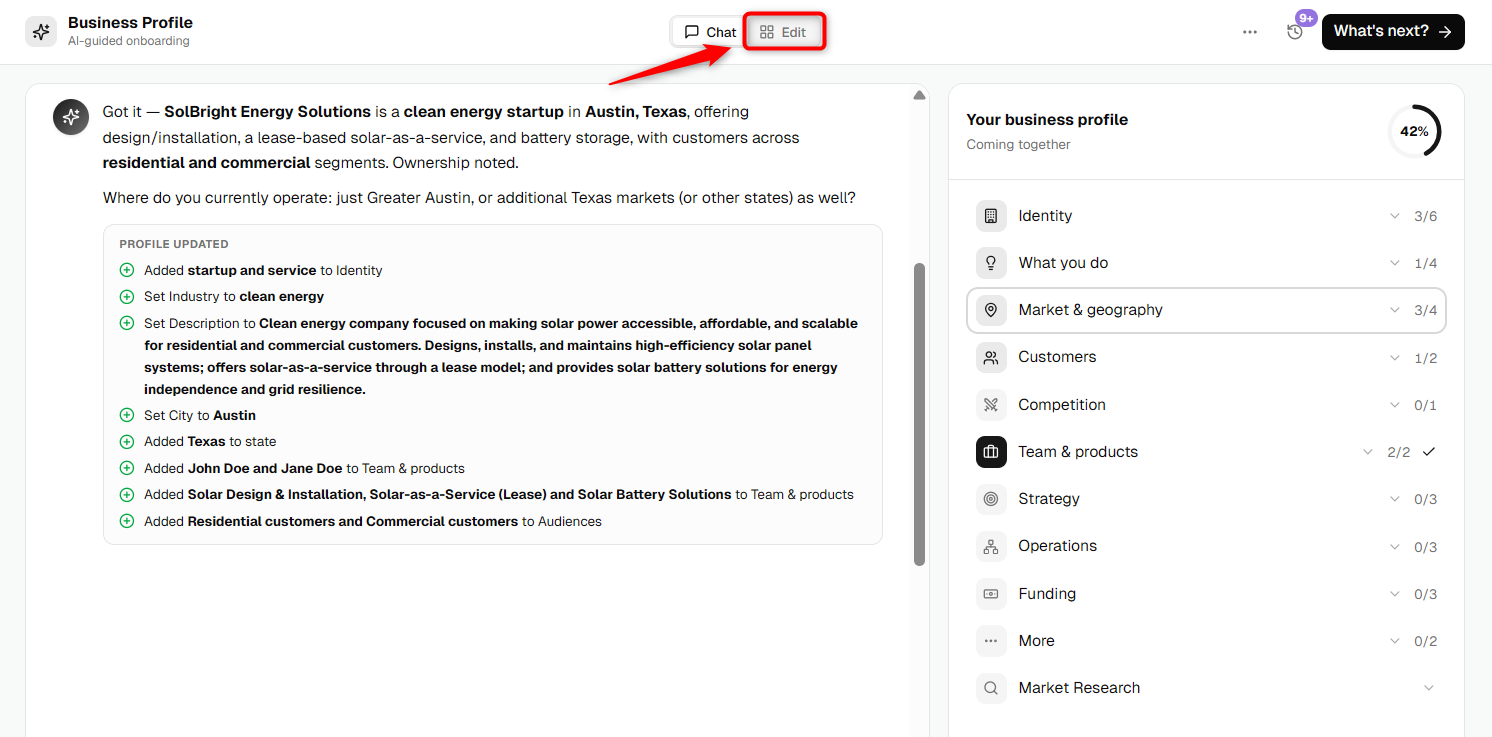
This opens a structured view where you can edit details such as your business identity, audience, products, strategy, operations, funding, and more.
- 4
-
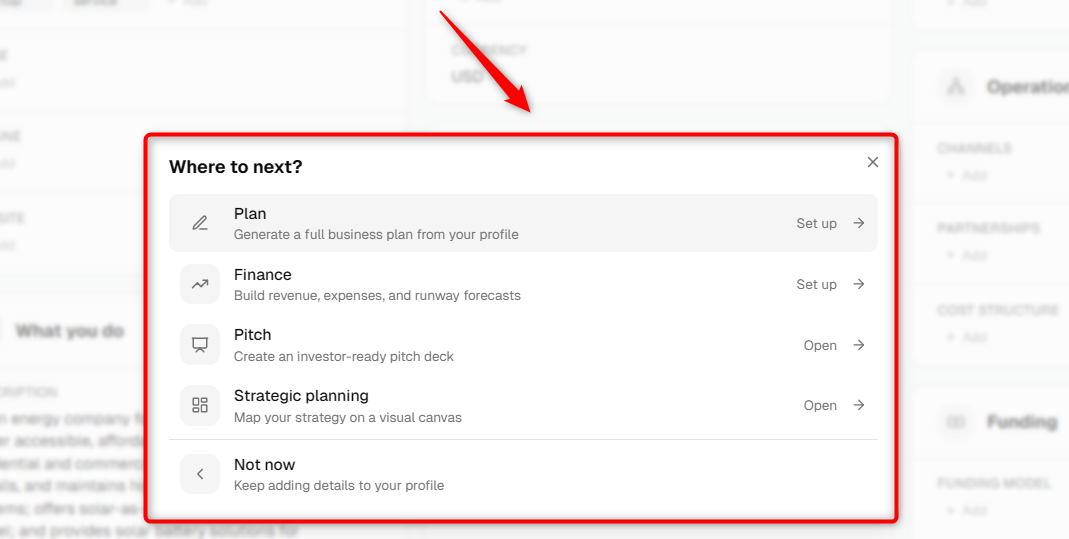
After completing your Business Profile, click What's next? in the upper-right corner.
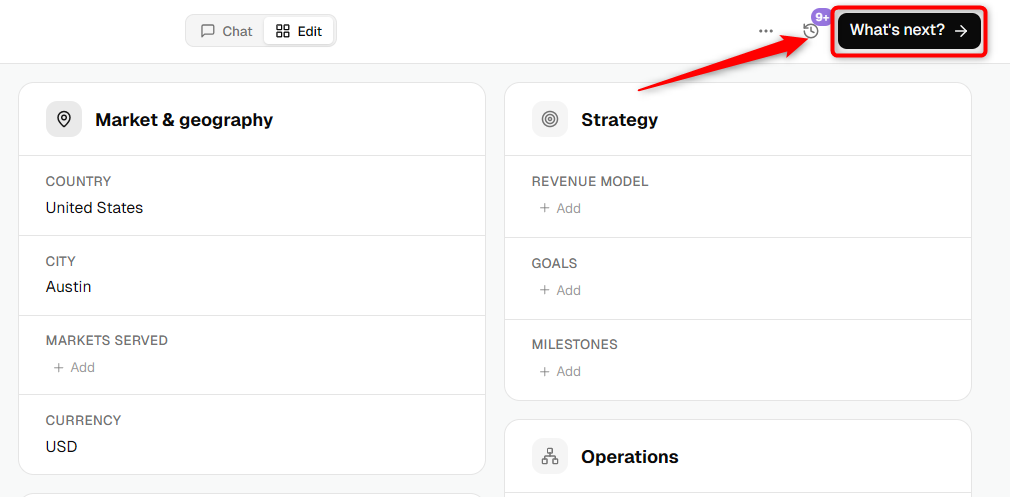
From there, you can choose to:
- Create your Business Plan.
- Set up your Financial Forecast.
- Open your Pitch Deck.
- Start Strategic Planning.
- Return to your Company Home page by selecting Not now.


TIP: You don't have to complete your Business Profile in one sitting. Upmetrics automatically saves your progress, so you can return and continue editing at any time.
Once your Business Profile is complete, you're ready to generate your Business Plan or continue exploring other planning tools available in your Company homepage.