Managing the AI feature in your account
The AI feature is designed to help you write, improve, and automate various parts of your business planning process. It acts as a smart assistant that guides you with suggestions, generates draft content, and significantly reduces the time spent on manual writing across various modules, such as business plan builder, financial forecasts, pitch decks, and the strategic planning module.
While the AI feature can significantly enhance productivity and speed up planning, some users or teams may prefer to disable it for full manual control, compliance reasons, or to maintain consistency in writing tone and style. Others may wish to activate AI only in specific companies or for their users.
We give you full flexibility, allowing you to enable or disable the AI feature at both the company level and the account level, depending on your preferences and workflow.
This guide will walk you through the steps to enable or disable the AI feature on both the company level and the account level.
In this article
Enable or Disable the AI Feature at the Company Level:
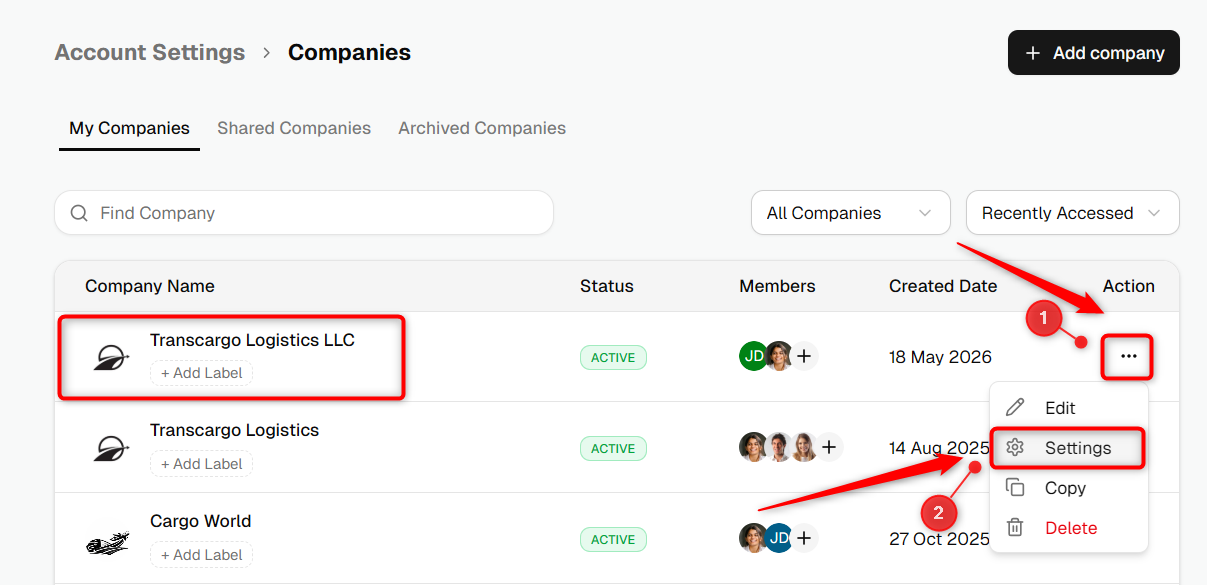
You can control whether the AI feature is available for a specific company. Follow the steps below:
- 1
-
Select your preferred company and click on the Settings section from the company menu.
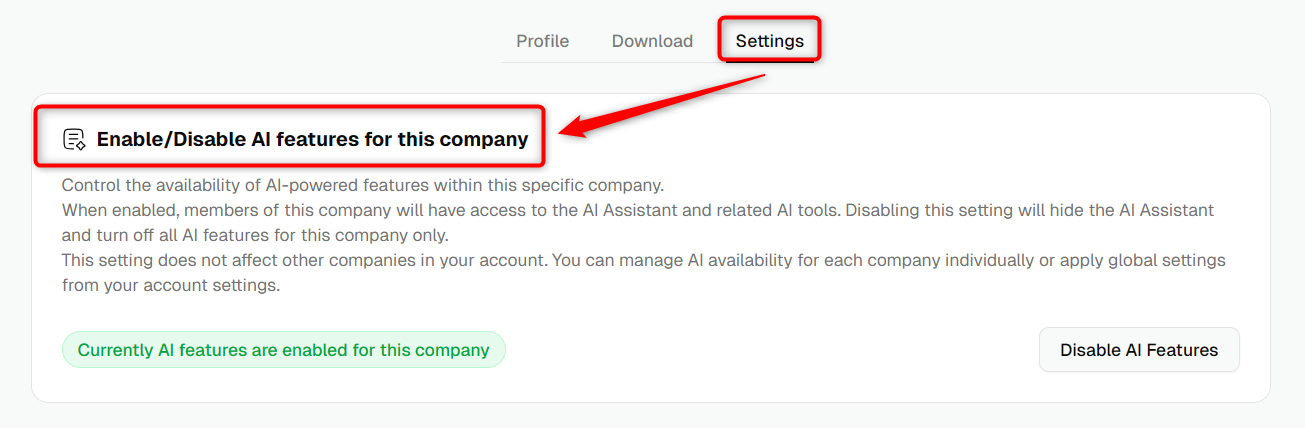
- 2
-
Now, in the Settings tab, locate the Enable/Disable AI features for this company section.
- 3
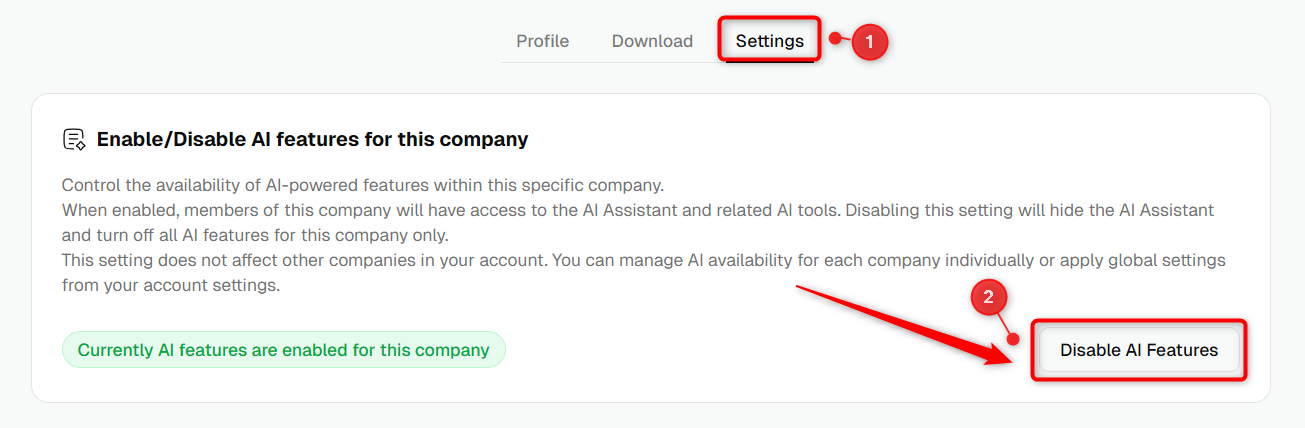
-
Here, if the AI feature is currently enabled, you will see the option to Disable AI Features.
Click on this option to turn off the AI features for that company. This will hide the AI feature and deactivate all AI-related tools in that company only.
- 4
-
Once the AI feature is disabled, you will see the option to Enable AI Features.
Click this button to activate the AI functionality again for that specific company.

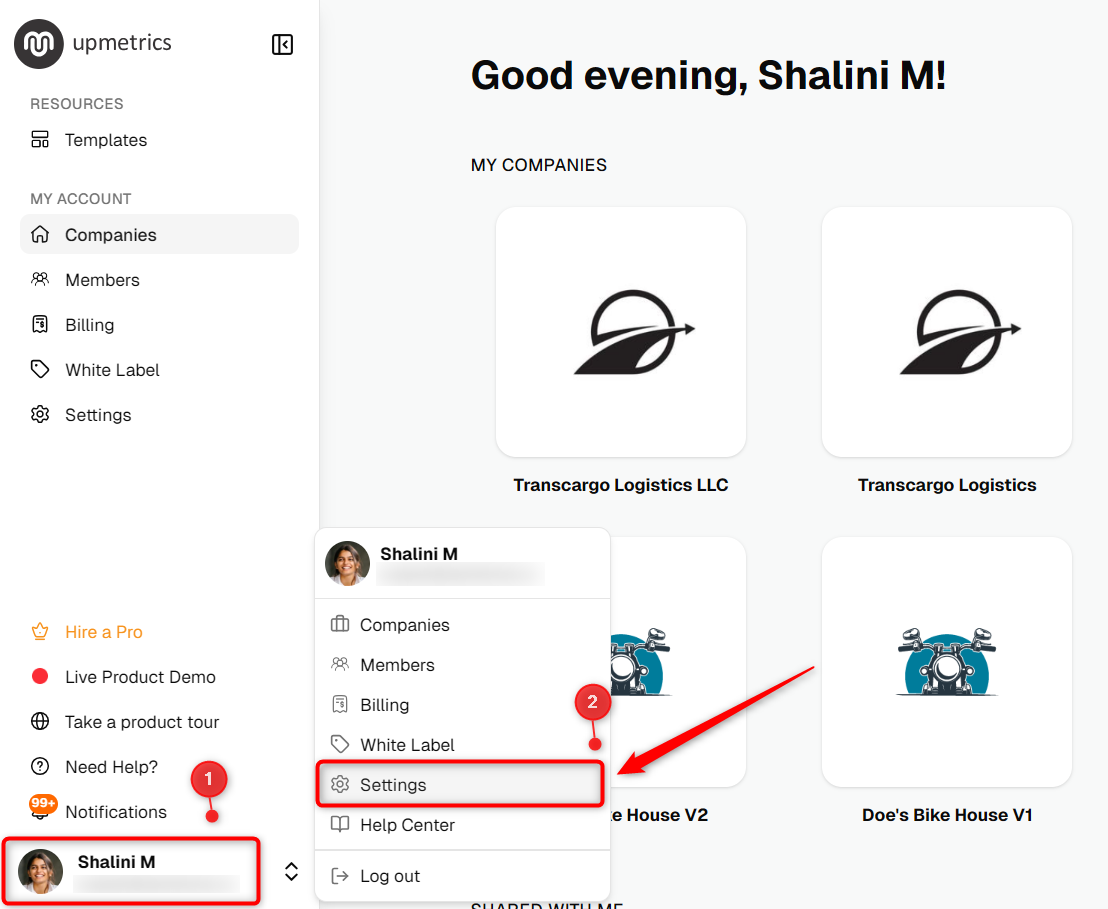
- 1
-
Navigate to the profile icon located at the bottom-left corner of your account and click on it.
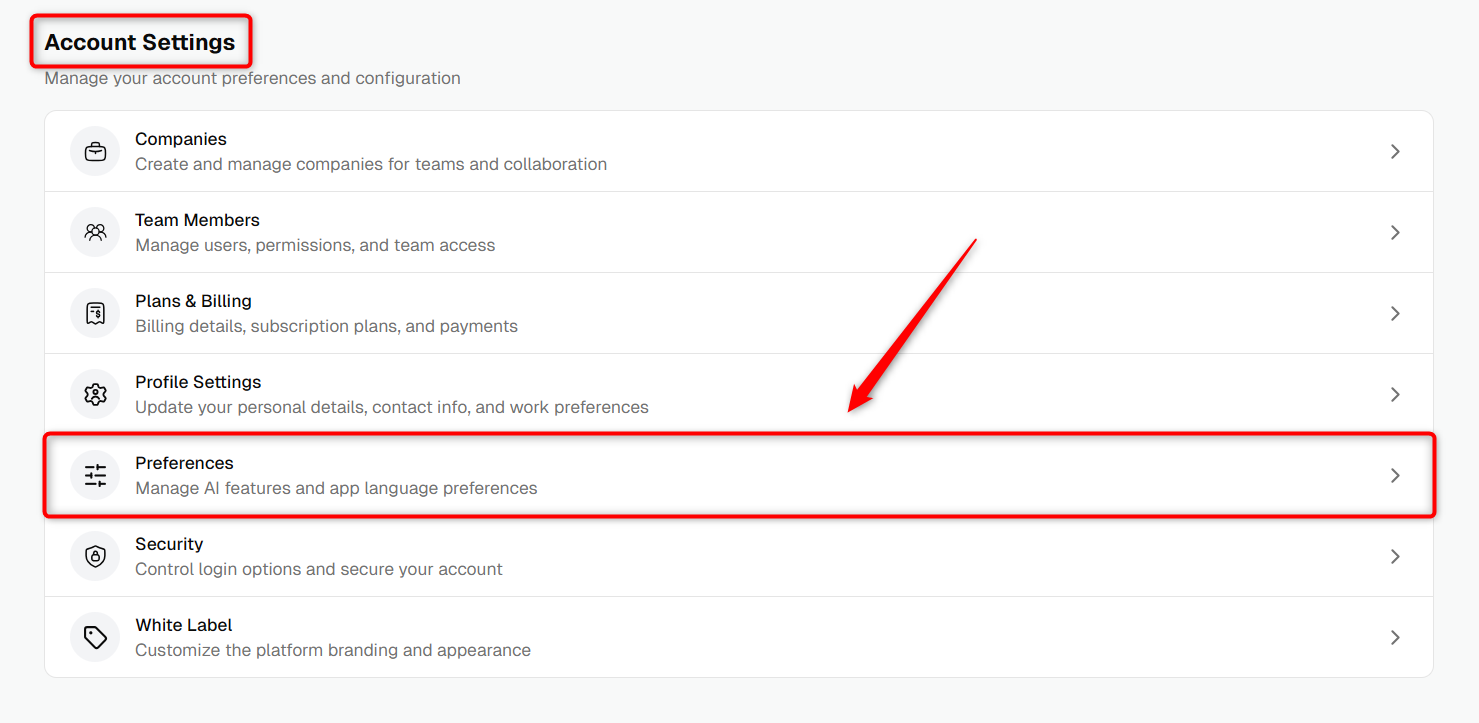
Now, from the scroll-up menu, select the Account Settings option.
- 2
-
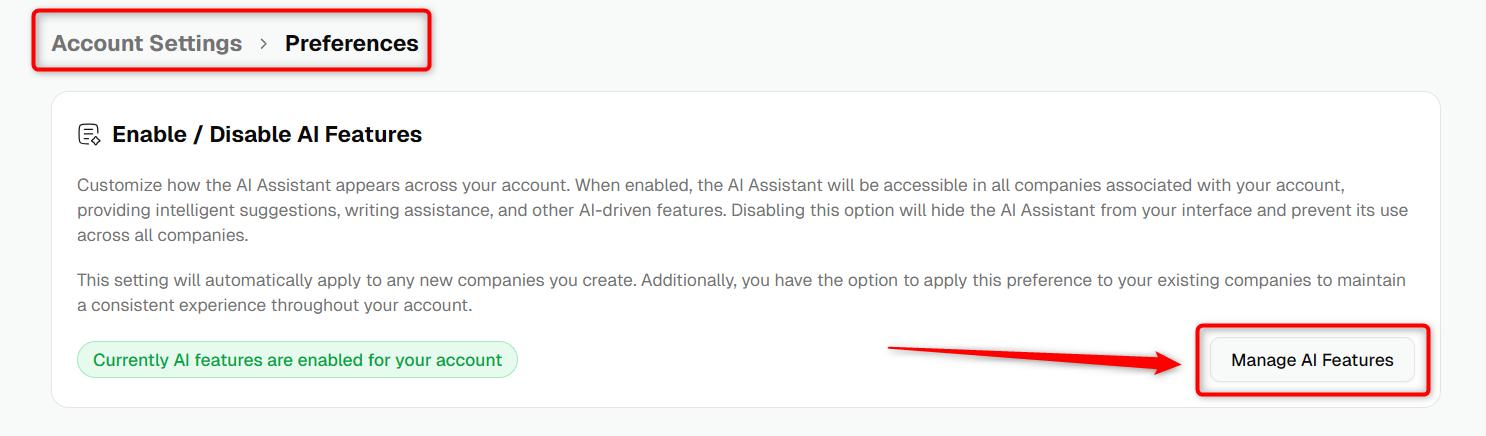
In the Account Settings section, Go to the Preference section and locate the panel titled Enable / Disable AI Features and click the Manage AI Features option.
- 3
-
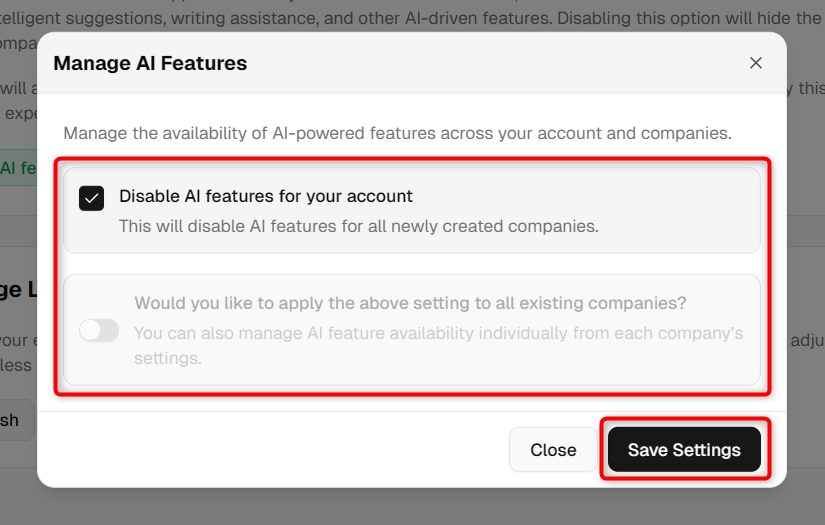
Here, a pop-up will appear with the following two options:
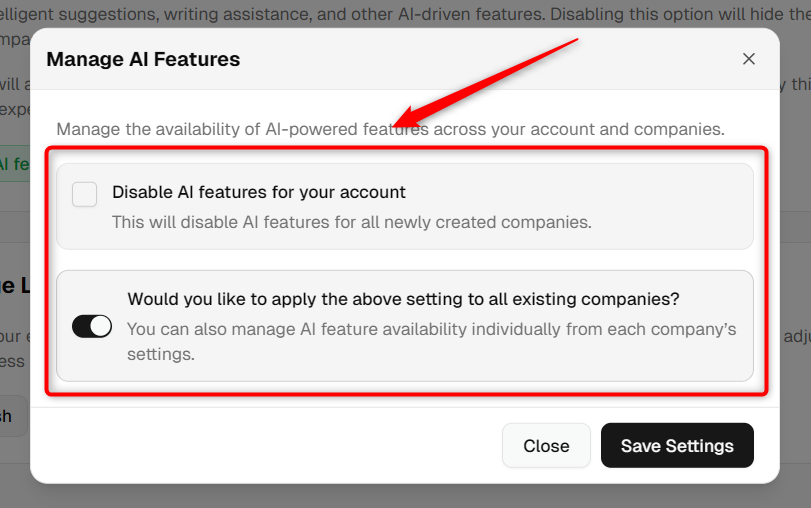
- Disable AI features for your account: This setting will disable AI features in all newly created companies moving forward.
- Would you like to apply above setting to all existing companies? (toggle): This will apply your chosen preference to all current companies.
- 4
-
Choose your preferred option based on your needs and then click Save Settings to apply the changes.


NOTE: These changes apply only to the selected company and do not affect AI settings in your other companies.
How to Enable or Disable the AI Feature at the Account Level?
If you want to manage the AI feature across all your company at once, you can configure it from your account settings. Here's how:


NOTE: This change affects AI availability in all selected existing companies and will be applied to new companies based on your chosen preferences.
Effect of AI Settings on Your Company Interface:
Here’s a quick look at how the interface appears with and without the AI feature. When enabled, AI tools and suggestions are visible across all modules. When disabled, these options are hidden.
- This is with the AI feature enabled:

- This is with the AI feature disabled:

Understanding AI Feature Setting Options:
- Disabling AI for All Newly Created companies: If you select the Disable AI features for your account option and save the settings, the AI feature will be turned off by default in all newly created companies. Existing companies will remain unaffected unless you choose to apply the setting to them separately.
- Disabling AI for All Companies (Current and New): Enabling both options and saving the settings will disable the AI feature for all your existing companies and automatically turn it off for any newly created companies as well. This ensures AI remains disabled across your entire account.
- Enabling AI for All Existing Companies: With this configuration, the AI feature will be re-enabled for all existing companies where it was previously disabled, as well as for newly created companies will continue to follow your current default AI settings unless changed manually.


Managing the AI feature in your account gives you the flexibility to control where and how the AI feature is used across your companies. Whether you prefer to enable AI to boost productivity or disable it to maintain a manual workflow at both the account and company levels.